8. Add seconds to system clock
If you like to know exactly what time it is - right down to the second - you can set the system clock to show seconds in addition to hours and minutes.
To add seconds to your system clock, navigate to HKEY_CURRENT_USER\Software\Microsoft\Windows\CurrentVersion\Explorer\Advanced in Regedit. Then create a DWORD (32-bit) value called ShowSecondsInSystemClock and set that value to 1. You can set it to 0 later if you get sick of seeing the seconds tick away while you’re trying to work.
Close Regedit and restart. Now, the next time you're watching the clock at the end of the day, you'll know whether you have 50 seconds or 25 seconds until 5 pm.
9. Add your favorite program to the right-click menu
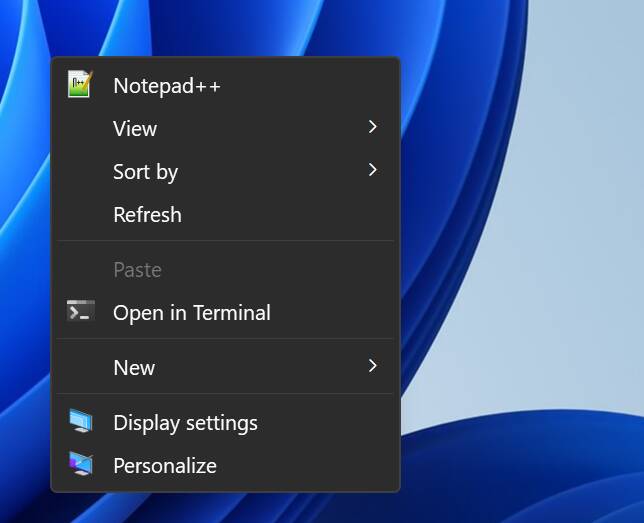
If you have a program that you use a lot, you can add it to the context menu that appears when you right click on the desktop. To make the most of this, we assume that you’ve already enabled the full context menu as shown above in the first hack.
First, take note of the path to the executable for the program you want to create a shortcut for. In my case, I’m going to use Notepad++, which installs to C:\Program Files\Notepad++\notepad++.exe.
Then open Regedit and navigate to HKEY_CLASSES_ROOT\Directory\Background\shell. Create a key under the shell folder with the name of the app (in my case, "Notepad++"). Enter that folder.
Create a string value in the folder and name it Icon with a capital I. Enter the full file path to your executable as the value with quotes around it.
Create another Registry key (aka folder) underneath this one (e.g., Notepad++) and name it Command with a capital C. Open the (Default) value in this folder and set it to the executable file path (again with quotes around it).
Close Regedit and reboot. The new app is now on your classic context menu.
If you want your icon to appear at the top of the list (above View), create a string value named Position in the same folder as the Icon value and give it a value of Top. Then your icon will be above all others.
- Microsoft keeps adding stuff into Windows we don't want – here's what we actually need
- Microsoft readies Windows 11 25H2 while Windows 10 circles the drain
- Nano11 cuts Windows 11 down to size, grabbing just 2.8 GB of disk space
- How to get rid of useless keys in Windows and turn them into something helpful
10. Click once on taskbar to get last active window
It happens all the time. You have multiple windows from the same application open – most often from a browser – and to get to a particular one, you need to hover over the taskbar icon and then choose the thumbnail you want.
But, with a simple Registry tweak, you can fix Windows 11 so that clicking on the program's taskbar icon immediately takes you to the most recently active window from that application. If the browser window with theregister.com was the last one you were looking at, then clicking the browser's icon should make that the active window.
To enable this feature, navigate to HKEY_CURRENT_USER\Software\Microsoft\Windows\CurrentVersion\Explorer\Advanced in the Registry. Then create a DWORD (32-bit) value there called LastActiveClick. Finally, set that value to 1.
When you reboot your computer, clicking a taskbar icon will take you to the last window you were using from that app.
11. Have startup apps launch more quickly
If you have apps that you’ve set to start when Windows starts, you will notice that it may take a while after the desktop appears before they start opening. In fact, on a Windows install I just tested, it took around a minute after the desktop had loaded before my startup apps appeared.
However, with a simple Registry tweak, you can tell Windows to start opening apps right away. Granted, if your computer is slow, you may want to leave the default delay in place to give your PC time to reach a comfortable idle state before it starts launching programs. But if you have a reasonably modern computer, you’ll benefit a lot from making this change.
To get rid of the startup delay, first navigate to HKEY_CURRENT_USER\Software\Microsoft\Windows\CurrentVersion\Explorer in Regedit. Then create a new key underneath that one and call it Serialize.
In Serialize, create two DWORD (32-bit) values: StartupDelayInMSec and WaitForIdleState. Set both of those to 0.


