Defederating GoDaddy 365
Customers can purchase a Microsoft 365 subscription direct with GoDaddy along with their primary domain. When this occurs, GoDaddy federates this domain and tenant, making it unable to transfer under the CSP program or Direct to Microsoft. Moving and defederating this account has been a major pain point and area of confusion which this blog post addresses.
In the solutions proposed in this guide you can perform the following:
- Defederate the tenant without migrating
- Never have to call GoDaddy
- Keep user accounts vs deleting them
- Have no downtime
High level-steps:
A. Prepare your End Users
B. Become a Tenant Admin in GoDaddy
C. Remove Federation with GoDaddy
D. Reset Users Passwords
E. Add a CSP Provider or Move Direct to Microsoft
F. Provision Licensing into the Account
G. Remove GoDaddy as Delegated Admin
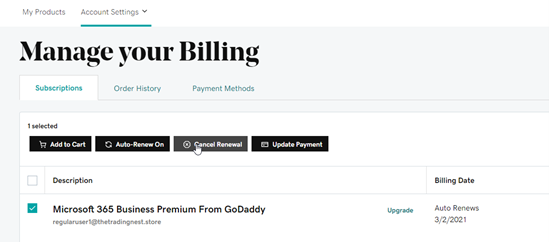
H. Cancel GoDaddy Subscription
Prepare Your End Users
- Defederating requires users to reset their passwords in order to be able to login to their account. You will need to have a password list to distribute to them or have them provide you passwords beforehand. You could just reset them all to a temporary password after federation and then they can change to whatever they want after.
- Define a date and time in which you will be defederating. I recommend during non-business hours even though there is no downtime in mail flow with this solution. Provide end users with this information.
- Since users may run into activation prompts within their office apps and outlook during the license transition, provide them documentation for how to sign back in after the license switch has taken place. For office apps they can simply go to File>Account>Sign Out>Sign In.
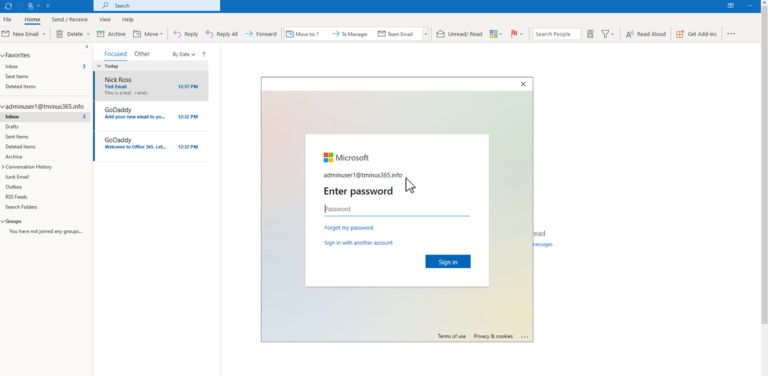
- In outlook, users will be prompted to re-enter their new password after its changed:
Become a Tenant Admin in GoDaddy
When a user sets up a 365 account directly with GoDaddy, they set up the initial user as an “admin” user but this user is redirected to the GoDaddy portal when trying to access the admin tab when going to Office.com. For this reason, we need to gain access to the true Global Admin so that we can perform the necessary powershell scripts to defederate the tenant.
- Login to Portal.Azure.com with the admin user that was set up when the account was first created and click on the 3 lines in the top left corner
- Click on Azure Active Directory. Then click on Users when the new tabs open up
- Here you should see a user label with admin@.onmicrosoft.com Ex:

Click on this user and reset their password. If you already have access to this user, you can disregard this step.
Once you have copied the temporary password, place it in a notepad and open an incognito window in the browser. In the browser, go to office.com and sign in with that username and temporary password. Establish a new password. With this completed, you now have a user that can run the necessary powershell commands in the future steps.
Remove Federation with GoDaddy
We can use the following PowerShell cmdlets to defederate the tenant. Note that you need to run PowerShell as administrator.
Write-Host "Checking for MSGraph module..."

$Module = Get-Module -Name "Microsoft.Graph.Identity.DirectoryManagement" -ListAvailable

if ($Module -eq $null) {

        Write-Host "MSGraph module not found, installing MSGraph"
        Install-Module -name Microsoft.Graph.Identity.DirectoryManagement

    }
Connect-MgGraph -Scopes "Directory.Read.All","Domain.Read.All","Domain.ReadWrite.All","Directory.AccessAsUser.All"
#Enter the Admin credentials from "Become a tenant Admin in GoDaddy"

Get-MgDomain
#See that the domain is “federated”#

Update-MgDomain -DomainId "<InsertFederatedDomain>" -Authentication Managed
An example of a DomainId is “tminus365.com”. This would be the domain that was listed as federated that you want to covert to managed. After this is complete you will get a new commandline. You can run Get-MgDomain again and see that your domain is now “managed”.
Supporting CMDLET docs:
Reset Users Password
##########Connect to MsGraph##########Write-Host "Checking for MSGraph module..." $Module = Get-Module -Name "Microsoft.Graph.Users.Actionst" -ListAvailable if ($Module -eq $null) { Write-Host "MSGraph module not found, installing MSGraph" Install-Module -name Microsoft.Graph.Users.Actions } Connect-MgGraph #Enter the Admin credentials from "Become a tenant Admin in GoDaddy" ############# Define CSV path of Users and Group ################## $UserPath = Read-Host -Prompt "Enter File Path For CSV list of users" #####Create CSV template with headers of Userprincipalname and Password####### Import-Csv -Path $UserPath |%{Update-MgUserPassword -UserId $_.UserPrincipalName –NewPassword $_.Password}
Add a new Provider and Provision Licensing
Now that the tenant is defederated, you can add a CSP provider with their delegated admin link or go direct to Microsoft.
For CSP:
Paste the appropriate link in a browser and sign into the tenant with the Global Admin credentials if you are not already logged in. Accept the relationship. After the acceptance, reload the page and you will see a new CSP listed.
Order licensing for this customer. If you are not changing the subscription, then all you would need to do is provision the same amount of seats as you have today, remove them as delegated admin, and cancel with GoDaddy. There is no other action that would be required. License ownership would transfer and there will be no downtime for users.
If you are changing the subscriptions that are assigned to users (i.e. you are moving them from Business Standard to Business Premium as an example) you will need to perform the following steps:
- Order the licensing from CSP
- See the licensing provisioned in the 365 Tenant for this customer under Billing>Your Products
- Go to Users>Active Users and bulk assign the new licensing from CSP and unassign the licensing from GoDadddy.
- Remove GoDaddy as Delegated admin
- Cancel the GoDaddy subscription in the GoDaddy admin portal.
For Microsoft Direct:
- In the Microsoft Admin Portal, go to Billing>Purchase Services
- Purchase the licensing you want to have for your users
- Follow the same steps as CSP to Assign licenses to users if you have changed their subscription type. (i.e. Moving from Business Standard to Business Premium).
Remove GoDaddy as Delegated Admin and Cancel Subscription
In the 365 Admin Portal
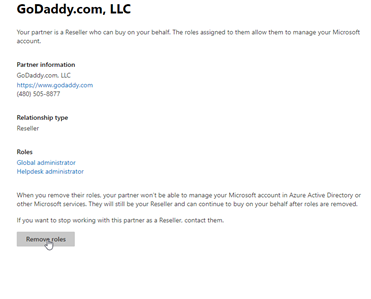
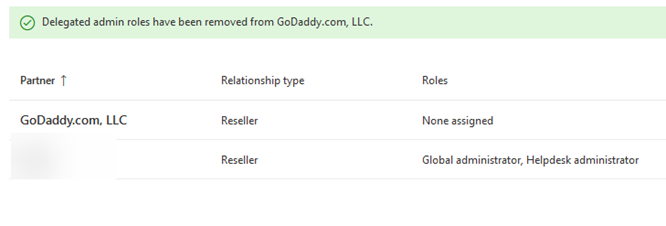
Under Settings>Partner Relationships>Click on GoDaddy and remove their roles:
In GoDaddy, cancel the renewal:
Conclusion
From here, the subscription from GoDaddy will expire at end of term and that is all. You now have a tenant under CSP with all of the typical management functionality you are familiar with. Hope this provided some targeted guidance on defederating a GoDaddy tenant! Please share with the community!
 .
.